Hengua ~ Combining Henna with Jagua
Henna is not Jagua, and Jagua is not Henna… So what is Hengua? It’s both!
When people of various cultures come together, many similarities and differences are revealed for us to appreciate. Giving us, the artists, dreamers and seekers on planet earth, the opportunity to approach the old ways in a new way, which in turn gives birth to something new, something never seen before.
Hengua, a current term referring to the combination of two ancient forms of all natural body art, Henna & Jagua. Henna is a plant and ancient form of body art from parts of Asia and Africa. Jagua is a berry, also an ancient plant used for temporary body adornment, from South America. The leaf of the henna plant, mixed into a paste, is used to stain the skin, resulting in a rich orange to reddish/brown tones. The juice from the jagua berry will stain a dark, blue almost black color. Combine the two plan materials together and you now have the ability to create beautiful all natural temporary tattoos with gradients and shades of orange / red to brown / purple to blue / black.
A combination henna & jagua tattoo can be achieved in a number of ways.
You can mix a few different of batches of henna paste with jagua gel, each batch with a different ratio of henna to jagua. Each different blend will achieve a different color or stain. For instance, add a little jagua to henna and you will see a nice dark brown stain result. Mix henna & jagua half and half for a richer brown almost purple stain.
You can then use these different mixes each on their own in one design, or together, alternating to create a pattern of different shades of henna to jagua.
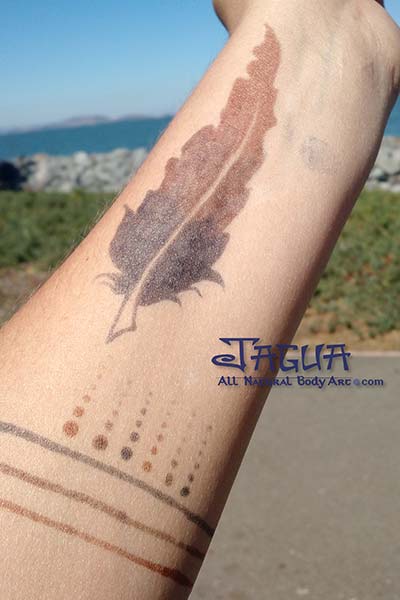
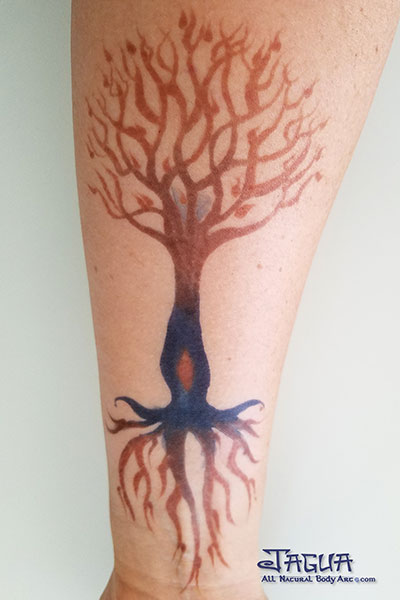
A technique I really love is using a paint brush to blend the different batches of henna to jagua ratios to create a gradient. You can do this with solid shapes like a Tree or a Feather, as seen in the 2 top photos.
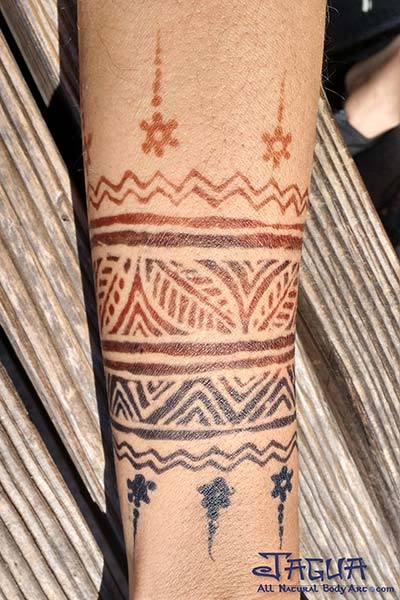
I also love using the paintbrush technique in combination with a resit technique. First I cover the skin in an intricate pattern using body art quality glue, then paint the different blends of Hengua over the resist, to create a lovely gradient. See photo 2nd from the bottom.
Aftercare For Hengua - Henna & Jagua Combo
Hengua Aftercare is tricky… the aftercare is very different for henna and for jagua. Where you want to keep henna on as long as possible and avoid contact with water, jagua only needs to be on the skin a few hours and needs to be washed off before bedtime. So what to do?
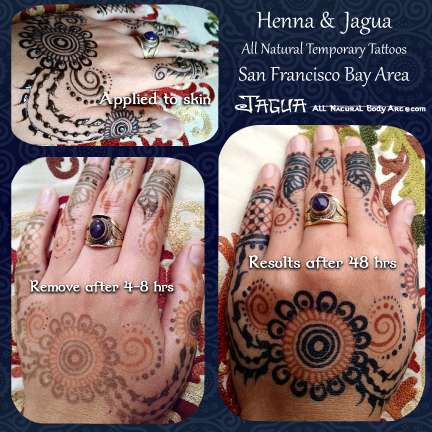
I currently recommend keeping the Hengua, henna paste and jagua gel combo, on as long as possible, at least 4-8 hours. Remove the Hengua carefullly. Gently peel the paste / gel mixtures off your skin. The parts with the most jagua may need some extra help by washing gently with soap and water. It is ok to get the henna part of your tattoo wet, however less time spent in the shower or with water the better.
Keep in mind not to scrub, exfoliate or scratch at your skin when removing the Hengua, henna paste and jagua gel combo. This can take tiny layers of skin off with it, creating a bubble effect and imperfect stain results which you won’t even be aware until the next day.
Extra important precaution: Jagua does have the ability to transfer from skin to skin during the first 12-24 hours, even after washing it off. I recommend when sleeping that first night after application and washing off the gel, that you do your best to keep the skin area covered. Depending where the design is located, sleep with a t-shirt on or wrap the skin area in tissue or toilet paper for extra added protection from possible transfers.